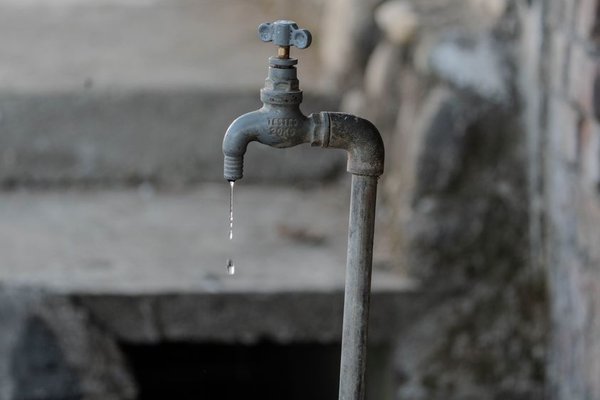
A dripping faucet is easy to ignore because the problem seems small: one drop, a pause, then another. But the sound usually points to a worn seal, damaged cartridge, mineral buildup, or debris inside the valve. The useful first step is not replacing random parts. It is identifying the faucet type and narrowing down where the leak is coming from.
Many dripping faucet repair jobs are manageable with basic hand tools. Before taking anything apart, close the hot and cold shutoff valves under the sink, open the faucet to release pressure, and cover the drain so small screws cannot disappear into it.
Start by Confirming Where the Faucet Is Leaking
A drip from the end of the spout usually means an internal valve component is no longer sealing completely. Water around the base of the faucet, under the handle, or inside the cabinet points to a different problem, such as an O-ring, supply connection, or mounting seal.
Wipe the faucet dry and watch it briefly. If water only appears at the spout while the faucet is off, focus on the valve mechanism. If water appears around the handle while the faucet is running, inspect the seals around the stem or cartridge instead.
Identify the Faucet Type Before Buying Parts
The most common faucet drip causes depend on the valve design. A two-handle compression faucet often uses rubber washers that press against valve seats. Cartridge faucets use removable cartridges. Ball faucets contain a rotating ball with seats and springs, while many modern faucets use ceramic-disc cartridges.
If you are unsure which design you have, remove the handle after shutting off the water and compare the internal part with the manufacturer’s diagram. Take a clear photo before disassembly so you can restore the parts in the correct orientation.
Compression Faucets
Older two-handle compression faucets are a common candidate for a simple leaky faucet fix. A worn rubber washer at the bottom of the stem may allow water to pass when the handle is closed. The valve seat can also become rough or corroded.
Remove the handle and packing nut, pull out the stem, and inspect the washer and O-ring. Replace damaged rubber parts with matching replacements. If the valve seat is badly pitted, a new washer alone may not stop the faucet leak.
Cartridge Faucets
On many single-handle and two-handle cartridge faucets, a persistent drip means the cartridge is worn, contaminated with debris, or no longer sealing properly. Shut off the water, remove the handle and retaining hardware, pull the cartridge, and clean the valve body before installing the correct replacement.
Do not assume cartridges are interchangeable. Match the faucet model or original cartridge exactly because tabs, seals, ports, and retaining clips can differ even when two cartridges look similar.
Ball and Ceramic-Disc Faucets
A ball-style faucet may drip because its rubber seats and springs have worn or collected sediment. Replacing those parts can solve a spout drip when the ball and valve body are still sound. Keep small parts arranged in removal order to make reassembly easier.
Ceramic-disc valves are durable but can still leak because of debris, damaged seals, or a failed cartridge. Depending on the model, the repair may involve cleaning the valve body, replacing seals, or replacing the complete cartridge assembly.
Try Flushing Debris Before Replacing Parts
Sediment can create a drip even when the main components are not badly worn. Manufacturers such as Delta recommend flushing certain faucets when debris may be trapped inside. With the supply controlled and the faucet opened according to the manufacturer’s instructions, cleaning the valve body and flushing loose material can restore a proper seal.
Clean the aerator while it is removed as well. Mineral particles in the aerator do not usually cause an internal shutoff leak, but they can reduce flow and make troubleshooting more confusing.
A Practical Example: One Handle, One Persistent Drip
Suppose a single-handle bathroom faucet drips every few seconds after you turn it off. The cabinet below is dry, and there is no water around the handle. That pattern points toward the internal cartridge rather than a supply-line leak.
Shut off both supply valves, open the faucet to relieve pressure, remove the handle, and inspect the cartridge. If you find mineral deposits, clean the valve body carefully. If the cartridge is worn or damaged, replace it with the exact model specified for the faucet. Reassemble the fixture, restore the water slowly, and test both hot and cold positions.
This prevents a common mistake: replacing the aerator because that is where the water appears. The aerator is simply where the drip exits; the failed seal is usually farther upstream inside the faucet.
What to Check If the Faucet Still Drips
If the repair does not stop the leak, recheck the part orientation and make sure no old gasket, spring, or fragment remains inside the valve body. A cartridge installed incorrectly can create a new problem even when the replacement part is correct.
Persistent leaks can also come from a damaged valve seat, cracked faucet body, corrosion, or the wrong replacement cartridge. Compare the assembly with the manufacturer’s parts diagram. If the body is damaged or you cannot isolate the leak, replacing the faucet or calling a plumber may be more sensible.
Related maintenance topics worth linking internally include faucet cartridge replacement, cleaning a clogged faucet aerator, and fixing a leaking sink supply line.
Frequently Asked Questions
Why does my faucet keep dripping after I turn it off?
The most likely cause is a sealing component that is worn, dirty, damaged, or no longer seated correctly. Depending on the faucet, that may be a washer, cartridge, seat and spring set, O-ring, or ceramic-disc assembly.
Can I fix a dripping faucet without replacing the whole faucet?
Usually, yes. Many spout drips can be repaired by replacing an internal wear part or cleaning debris from the valve. Complete replacement is more likely when the faucet body is cracked, severely corroded, or correct parts are unavailable.
Should I turn off the water before repairing a faucet?
Yes. Close the hot and cold shutoff valves before removing handles, cartridges, stems, or retaining nuts. Open the faucet afterward to relieve trapped pressure. If the local shutoff valves do not work, use the home’s main shutoff before disassembly.
How much water can household leaks waste?
The U.S. Environmental Protection Agency says the average family can waste about 9,400 gallons of water per year from household leaks overall, so a persistent drip is worth repairing rather than leaving indefinitely.
Stop the Drip by Diagnosing Before Replacing
The best way to fix a dripping faucet is to work from the symptom toward the valve rather than swapping parts at random. Confirm that the leak is coming from the spout, identify the faucet type, shut off the water, inspect the sealing components, and clean out debris before fitting the correct replacement part.
For many faucets, a washer, cartridge, seat, spring, or seal is all that stands between a quiet fixture and a recurring drip. Careful diagnosis makes the repair faster, reduces the chance of damage, and helps you know when a component repair is enough and when the fixture itself should be replaced.