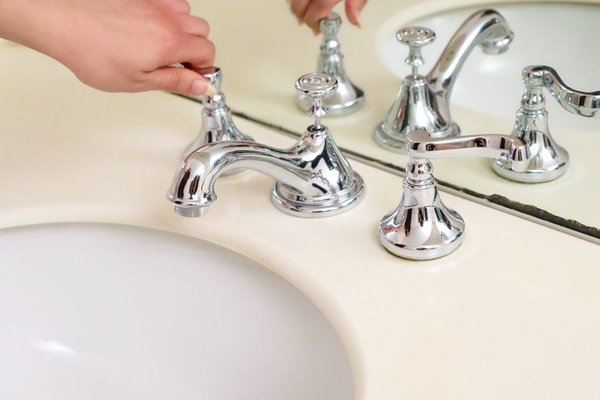
A weak, crooked, or splashy stream does not always mean there is a problem inside the faucet. The trouble is often at the tip of the spout. The aerator shapes the stream, but its small screens and passages can collect mineral scale, rust flakes, or debris from plumbing work. Replacing it can restore steady flow without taking apart the faucet.
Before buying anything, confirm that the aerator is the likely cause. If only one sink has reduced flow while nearby fixtures work normally, the aerator is a sensible first place to check. If several fixtures have suddenly lost pressure, the problem is more likely elsewhere in the plumbing system.
Identify the Aerator Before Removing It
Faucet aerators are not all built the same. Traditional models screw onto or into the spout and are easy to see. Concealed, or cache-style, aerators sit inside the outlet and usually require a matching key. Some modern faucets use model-specific outlets that are not intended to be removed, so check the manufacturer’s instructions if the design is unfamiliar.
If you can see a separate metal ring at the end of the spout, you probably have a standard threaded aerator. If the outlet looks almost flush, it may be concealed.
Gather the Right Tools and Protect the Finish
For a basic faucet aerator replacement, you may need only your hands, a towel, and the new aerator. For a stubborn exposed aerator, use adjustable pliers with a thick cloth or rubber pad between the jaws and the finish. Concealed aerators need the correct removal key.
Close the faucet handle fully and place a towel in the sink so a washer or insert cannot disappear down the drain. Avoid gripping a decorative finish directly with metal pliers.
Remove the Old Faucet Aerator
Start with hand pressure. From below the spout, many standard aerator housings loosen by turning counterclockwise, but do not force a part that clearly resists. Outlet designs vary. If it will not move, confirm the faucet model and removal method before applying more torque.
For a concealed aerator, insert the matching key into the notches and turn gently. If the original key is missing, identify the exact aerator size instead of forcing in a tool that almost fits. Note the order of the washer, screen, and internal pieces as it comes out.
Check Whether Cleaning Is Enough
A clogged faucet aerator often looks worse than it is. Inspect the removed screen. Grit can usually be rinsed away from the reverse side. For mineral buildup, soak removable components briefly in white vinegar, then rinse. Do not soak decorative faucet finishes unless the manufacturer says it is safe.
Try this practical test: after removing a serviceable aerator, briefly run the faucet with the outlet unobstructed. If the flow becomes strong and even, the restriction was at the aerator. If the flow is still weak, reinstall or replace the aerator and investigate the supply lines, cartridge, or an internal faucet flow restrictor. The aerator and flow restrictor are not necessarily the same component.
If cleaning clears the screen but the housing is cracked, the threads are damaged, or the stream remains distorted, replacement is the better choice. If removing the aerator makes little difference, low water pressure at one sink is the next issue to troubleshoot.
Choose the Correct Replacement
Take the old aerator with you when shopping, or record the faucet brand and model number. Match the thread type, diameter, and intended flow rate. A part that looks close in size may still have a different thread pattern and can damage the spout if forced.
For bathroom sinks in the United States, WaterSense-labeled faucet accessories are designed to reduce water use while maintaining useful performance. The lowest flow rate is not automatically best for every sink. Choose a replacement suited to the faucet, local requirements, and how the fixture is used.
Also check the washer or gasket. A missing, hardened, or damaged washer can cause leaking around the aerator even when the threads are correct.
Install the New Aerator Without Cross-Threading
Clean the spout threads with a soft cloth. Seat the washer correctly inside the replacement aerator, then start the aerator by hand. It should turn smoothly. If it becomes tight after only a partial turn or sits at an angle, back it out and start again. Cross-threading can damage the spout.
Tighten it only until snug. Most do not need heavy tool pressure. Turn on the water slowly and inspect the joint. The stream should be even, with no leakage around the aerator. If it leaks, remove the aerator, check the washer position, and reinstall it carefully.
If the problem turns out to be deeper in the faucet, related repairs such as faucet cartridge replacement or cleaning faucet supply lines may be more useful than repeatedly changing the outlet.
When a New Aerator Does Not Fix the Flow
A new aerator cannot fix every low-flow complaint. If the stream remains weak with the aerator removed, check that the shutoff valves under the sink are fully open and that flexible supply hoses are not kinked. A clogged cartridge, plumbing debris, or an internal restrictor can also reduce flow.
If hot water is weak but cold water is normal, or the reverse, the aerator is unlikely to be the only cause because both supplies normally use the same outlet. That pattern points toward a supply-side or cartridge issue.
FAQ
How often should a faucet aerator be replaced?
There is no fixed schedule. Inspect or clean it when the stream becomes uneven, flow drops, or mineral buildup is visible. Replace it when cleaning no longer restores performance or a part is damaged.
Can I replace a faucet aerator without turning off the shutoff valves?
Usually, yes. The faucet handle stops water at the spout, so closing the under-sink supply valves is not normally necessary for aerator work. Keep the faucet closed while removing and installing the part.
Why is my faucet still slow after I clean the aerator?
If flow stays weak even with the aerator removed, the restriction is probably elsewhere. Check the supply valves and hoses, then consider the faucet cartridge or any internal flow-control component specified by the manufacturer.
Are all faucet aerators universal?
No. Aerators vary by diameter, thread style, flow rate, and mounting design. Concealed aerators can require specific keys. Match the existing part or faucet model rather than assuming a visually similar aerator will fit.
A Small Part Can Make a Noticeable Difference
Replacing a faucet aerator is one of the simplest ways to correct a weak, irregular, or splashy stream when the problem is limited to one sink. Remove it carefully, test the flow, clean it if practical, and match the replacement to the faucet rather than forcing a near-fit part. If the flow improves with the aerator removed, you have likely found the restriction. If it does not, the test points you toward the next component to inspect.