Why a Kitchen Water Line Matters More Than It Seems
A kitchen water line is one of those hidden parts of the home that quietly does a lot of work. You may not think about it while filling a pot, rinsing vegetables, connecting a refrigerator ice maker, or running a dishwasher, but every one of those everyday tasks depends on a steady, safe water supply. When the line is planned well, the kitchen simply feels easy to use. When it is poorly installed, small problems can show up quickly: weak pressure, damp cabinets, slow leaks, strange noises, or water where it definitely should not be.
Installing a kitchen water line is not just about connecting a pipe from one point to another. It involves understanding water pressure, pipe material, shutoff access, appliance needs, and the layout of the kitchen itself. A neat installation can last for years with very little attention. A careless one can become an expensive headache tucked behind cabinets or under flooring.
Understanding What a Kitchen Water Line Does
In most kitchens, water lines serve more than the sink. The main supply usually feeds the faucet, but it may also connect to a dishwasher, refrigerator, water filter, pot filler, or instant hot water dispenser. Each connection has its own pressure and placement needs. A refrigerator line, for example, is usually narrow and flexible, while a sink line handles more frequent use and higher flow.
The water line may carry cold water only, or both hot and cold water depending on the fixture. Under the sink, you will usually see shutoff valves that allow water to be turned off without shutting down the whole house. These small valves are easy to overlook, but they are extremely important. If a leak starts or an appliance needs replacing, quick access to a shutoff can prevent a small drip from becoming a ruined cabinet.
Planning Before Any Pipe Is Installed
Good plumbing begins before the first fitting is tightened. The kitchen layout should guide where the line runs, how many branches it needs, and where shutoff valves should be placed. A sink against an exterior wall, an island sink, or a refrigerator on the opposite side of the room can each change the installation approach.
It is also important to think about future access. Water lines hidden deep behind fixed cabinetry may look clean at first, but repairs become harder later. A better plan keeps key connections reachable while still maintaining a tidy finish. This is especially true in remodeled kitchens, where beauty often gets more attention than serviceability. The best installations quietly respect both.
Local plumbing codes also matter. They may specify approved materials, connection methods, valve placement, and backflow protection. Even when the job seems simple, code requirements exist to protect the water supply and reduce the risk of leaks or contamination.
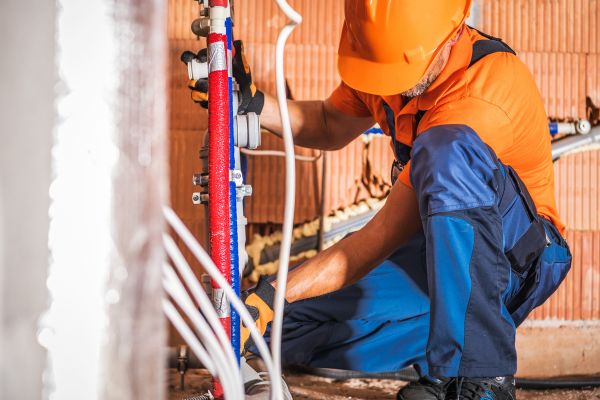
Choosing the Right Pipe Material
Different homes use different pipe materials, and each comes with its own strengths. Copper has long been valued for durability and heat resistance. It creates a clean, professional-looking installation, though it requires proper cutting, fitting, and soldering or press connections. PEX is flexible, easier to route through tight spaces, and common in modern residential plumbing. It can be especially useful when running lines through walls, floors, or cabinets.
There are also braided stainless steel supply lines, often used for final connections between shutoff valves and fixtures. These are not usually the main water line, but they are common under sinks and behind appliances because they are flexible and simple to replace.
The right material depends on the existing plumbing system, the distance of the run, local code, and the appliance or fixture being served. Mixing materials can be done, but it needs the correct adapters and fittings. A mismatched connection may hold for a while, then slowly fail when pressure changes or vibration works it loose.
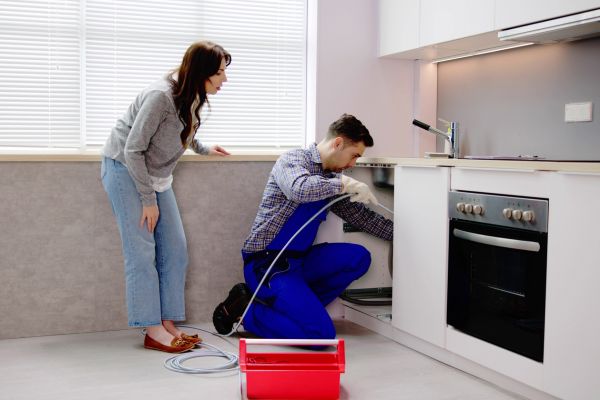
Installing a Kitchen Water Line the Right Way
Installing a kitchen water line usually starts with shutting off the water supply and draining pressure from the existing line. From there, the route is prepared. Holes may be drilled through cabinet walls, floor plates, or studs, depending on where the line needs to travel. The pipe should be supported properly so it does not rattle, sag, or rub against sharp edges.
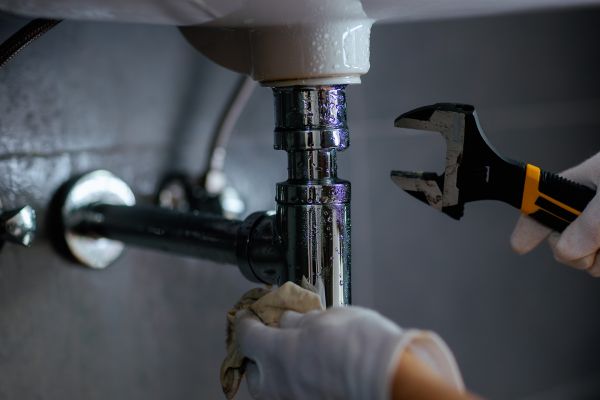
Once the line is routed, fittings and valves are installed. Shutoff valves should be placed where they are easy to reach, not buried in awkward corners. Connections are then tightened, crimped, pressed, or soldered depending on the material. This is where patience matters. Over-tightening can damage fittings, while under-tightening can leave tiny gaps that only reveal themselves once the water is turned back on.
After the line is connected, the system should be tested carefully. Water is restored slowly while each joint is checked for leaks. A dry paper towel can help reveal small moisture that the eye might miss. The line should also be observed under normal use, especially when appliances cycle on and off. Some leaks only appear when pressure changes.
Common Mistakes That Cause Problems Later
One of the most common mistakes is using the wrong type of tubing for the job. A refrigerator water line, for instance, should be durable enough to handle movement when the appliance is pulled out and pushed back in. Cheap plastic tubing can kink, crack, or leak over time.
Another issue is poor routing. Lines that are stretched too tightly, bent sharply, or left unsupported are more likely to fail. Pipes need room to expand slightly, especially when hot water is involved. They also need protection from screws, nails, and cabinet hardware.
Skipping accessible shutoff valves is another problem. It may save a little time during installation, but it makes future maintenance much harder. A shutoff valve near each fixture or appliance gives the homeowner control when something needs attention.
Then there is the quiet danger of slow leaks. A dramatic burst pipe gets noticed immediately. A tiny drip under the sink can hide for weeks, softening wood, encouraging mold, and damaging flooring. This is why testing and follow-up checks are just as important as the installation itself.
When a Kitchen Remodel Changes the Plumbing Plan
Kitchen remodels often create new water line needs. Moving a sink from a wall to an island may require water lines to run through the floor. Adding a dishwasher, refrigerator ice maker, or filtered water tap can also mean branching from the existing supply.
This is the moment to think practically. A beautiful kitchen can lose some of its charm if the plumbing behind it is cramped, noisy, or difficult to repair. During a remodel, walls and floors may already be open, making it easier to upgrade old pipes or add better shutoff points. It is often the best time to correct plumbing that has been patched together over the years.
Older homes deserve special attention. Galvanized pipes, aging copper, or outdated valves may not pair well with new fixtures. Installing new kitchen features on top of weak old plumbing can lead to frustrating results. Sometimes the smartest move is replacing a longer section of supply line instead of making one small connection to a tired system.
Water Pressure and Flow Considerations
A kitchen water line should deliver enough pressure for normal daily use without stressing the system. If the faucet sputters, the dishwasher fills slowly, or the refrigerator dispenser feels weak, the issue may be pipe size, blockage, valve restriction, or pressure imbalance.
Water pressure that is too high can also be a problem. It may seem convenient at first, but excessive pressure can wear out valves, hoses, and appliance connections faster. A pressure regulator may be needed in some homes to keep the system within a safe range.
Flow matters too. A line serving several fixtures at once must be sized and connected thoughtfully. Otherwise, turning on the sink may affect the dishwasher or refrigerator supply. In a busy kitchen, especially one used for cooking often, reliable flow makes a noticeable difference.
Maintenance After Installation
Once the water line is installed, it should not be ignored completely. A quick look under the sink every so often can catch early signs of trouble. Damp spots, mineral buildup, warped cabinet flooring, or a musty smell can all point to a small leak.
Appliance lines should also be checked. Refrigerators get moved for cleaning, dishwashers vibrate during cycles, and flexible hoses age over time. Even well-installed lines can loosen or wear after years of use. Replacing old supply hoses before they fail is often simpler than dealing with water damage later.
It is also wise to know where the shutoff valves are and make sure they still turn. Valves that sit untouched for years can become stiff or stuck. A shutoff valve that cannot shut off water during an emergency is not much help.
Conclusion
Installing a kitchen water line is a practical job, but it shapes the way a kitchen works every day. Behind the cabinets and under the sink, the quality of the installation affects water pressure, appliance performance, maintenance, and long-term peace of mind. The best approach is careful, not rushed: choose suitable materials, plan the route well, keep valves accessible, and test every connection with patience.
A kitchen may be judged first by its counters, cabinets, and lighting, but its comfort depends just as much on what is hidden. A reliable water line is quiet proof that the space was built with real life in mind.